html5-plugin-canvas-gamepad
html5 Canvas Gamepad Plugin
View the Project on GitHub 32teeth/html5-plugin-canvas-gamepad
CanvasGamepad
So you want to add a gamepad to a html5/canvas based app in html5
npm i html5-plugin-canvas-gamepad
working demo
CanvasGamepad setup and configurations
in you html file add CanvasGamepad.setup()
/*
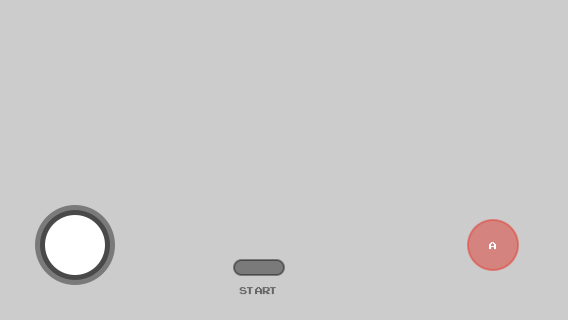
** this is a basic joystick and 1 button setup with start and select buttons
*/
onDeviceReady: function() {
CanvasGamepad.setup();
}
Configuration options
CanvasGamepad is fully customizable, from button names, colors, layout and more.
| property | type | value(s) |
|---|---|---|
| debug | boolean | true|false |
| trace | boolean | true|false |
| canvas | string | id of target canvas |
| buttons | array | [] |
| button | object | {name:string,color:hex|rgb|rgba} |
| layout | string | TOP_LEFT | TOP_RIGHT | BOTTOM_LEFT | BOTTOM_RIGHT |
| start | boolean | true|false |
| select | boolean | true|false |
| joystick | boolean | true|false |
| hidden | boolean | true|false |
if you are using multikey.js to extend the CanvasGamepad for keyboard access
| property | type | value(s) |
|---|---|---|
| buttons | array | [] |
| button | object | {name:string,color:hex|rgb|rgba} |
| hint | boolean | true|false |
Config examples
default options
CanvasGamepad.setup();
one button, custom name, no start button

CanvasGamepad.setup({
    start:false,
    buttons:[
        {name:"jump"}
    ]
});
two buttons, custom names, custom colors, with select button
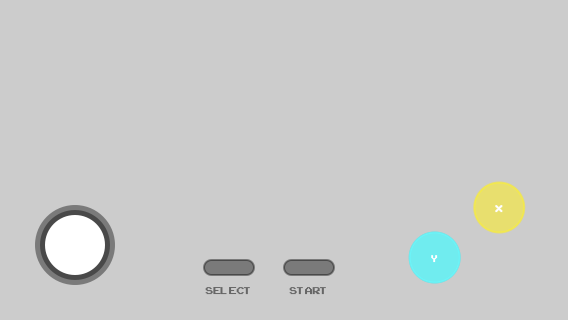
CanvasGamepad.setup({
    select:true,
    buttons:[
        {name:"x",color:"rgba(255,255,0,0.5)"},
        {name:"y",color:"rgba(0,255,255,0.75)"}
    ]
});
target canvas

CanvasGamepad.setup({
    canvas:"game"
});
change layout canvas
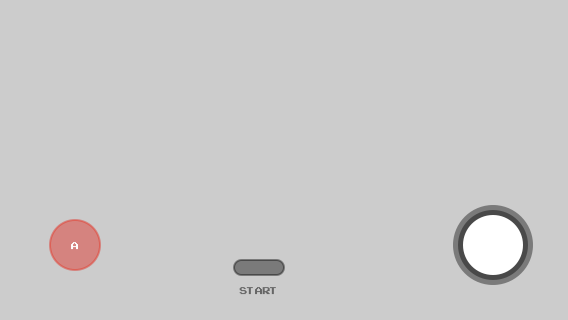
CanvasGamepad.setup({
    layout:"BOTTOM_LEFT"
});
show trace & debug info
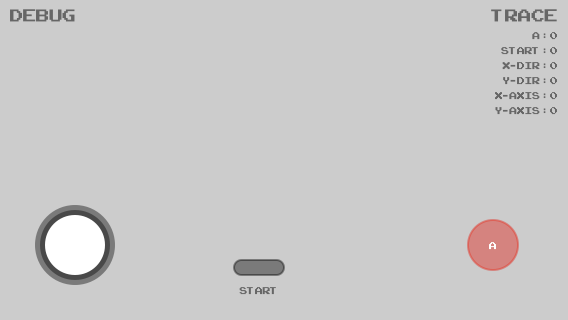
CanvasGamepad.setup({
    trace:true,
    debug:true
});
all out everything
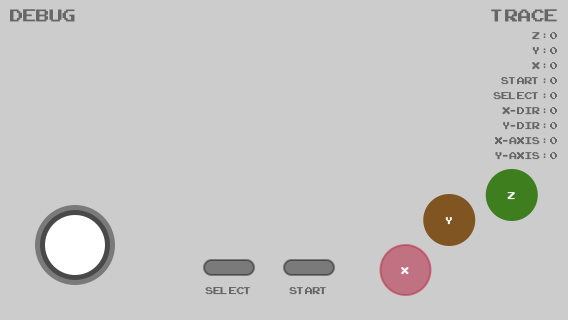
CanvasGamepad.setup({
    select:true,
    trace:true,
    debug:true,
    canvas:"game",
    buttons:[
        {name:"z", color:"#17861c"},
        {name:"y", color:"rgb(134, 83, 23)"},
        {name:"x", color:"rgba(204, 0, 51, 0.5)"},
    ]
});
hidden gamepad

CanvasGamepad.setup({
    hidden:true
});
real world example
/*
** @description start the game
*/
game.init();
/*
** @description setup gamepad, no stick, no start, one button
*/
CanvasGamepad.setup({
    canvas:"controller",
    joystick:false,
    start:false,
    buttons:[
        {name:"jump", color:"rgba(0,0,0,0.25)"}
    ]
});
example using key binding with multikey.js
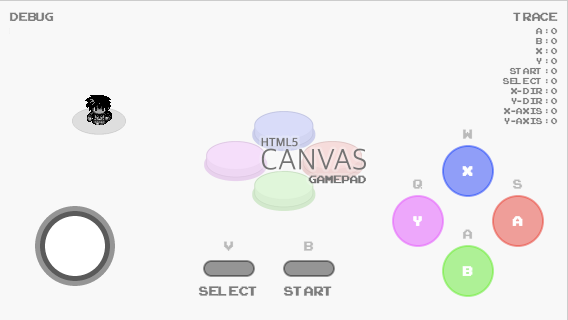
CanvasGamepad.setup(
  {
    canvas:"controller",
    start:{name:"start", key:"b"},
    select:{name:"select", key:"v"},
    trace:true,
    debug:true,
    hint:true,
    buttons:[
      {name:"a", "key":"s"},
      {name:"b", "key":"a"},
      {name:"x", "key":"w"},
      {name:"y", "key":"q"}
    ]
  }
);
multikey.setup(CanvasGamepad.events, "qwasbv", true);
the above code is running in this example
CanvasGamepad observable method
CanvasGamepad has an observable method that returns the current state map of the gamepad
observe();
CanvasGamepad.setup()
/*
** @description the below example simply logs out the observe method return
*/
setInterval(
    function()
    {
        var map = CanvasGamepad.observe();
        console.log(new Date() + ":" + JSON.stringify(map))
    }
    ,1000
);
/*
** @description additionally, you can throw it into your main loop in canvas
*/
function draw()
{
    if(CanvasGamepad)
    {
        gamepad(CanvasGamepad.observe())
    }
}